Angle Iron Jig for Cutting Window Openings

By Ronn Hann (reprinted from spring 2010 newsletter)

Angle Iron window opening

Ronn Hann's Angle Iron Technique

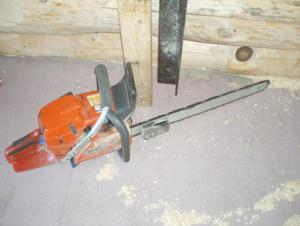
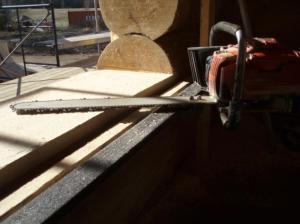
I use steel angle iron for a guide when cutting window and door openings. I buy two 20′ lengths and have them sheared or cut into one 12′, one 8′, one 10′, one 4′, and one 6′. This gives me a variety to cover most windows and doors. I simply rest the vertical angel iron on the floor using a magnetic level to position it plumb. With numerous holes in the angle iron, it is screwed to the logs. Then I have a guide bolted on to the chainsaw bar that will slide on the angle iron ensuring it cuts plumb. It is a little tricky getting started without jumping all over the wall. Holding the bar steady and parallel to the guide, slowly advance it into the wood. It doesn’t take long to master the technique. Hopefully you cut your sills and header on a sawmill as the logs are stacked up. If not, this jig can help cut the header and sill also.

Window Sill Cut

Window Sill Cut

A variation of this with multiple windows the same size is to frame together two vertical 2 x 4’s or 2 x 6’s with two horizontal 2 x 4’s. Stand it into position and attach to the walls. Now mark the appropriate elevation for the top of the header and the bottom of the sill. When the jig is moved to the next window, reset the angle to exactly the same elevation on your mark.

I also use this jig to trim the stair treads after the stairs are pre-fit. The angle is screwed onto the tread noses and all cut in one plane.

*******************

Join GLLCA for more support and tips from a network of experienced log builders!

Posted in Log Building Tips, Ronn Hann, Tools and Jigs | Tagged | Leave a comment

Bandsaw Chainsaw Chopsaw

By Ronn Hann (reprinted from spring 2010 newsletter)

My sawmill adaptation makes a “bandsaw chainsaw chopsaw.” I bolted a chainsaw guide onto the cube frame of my sawmill to enable me to cut the ends of a post perfectly parallel to one another. It is also used to cut post pockets on the bottom side of a ridgepole.

Ronn Hann's Bandsaw Chainsaw Chopsaw

I started by bolting two pieces of ¼” x 2” x 36” stainless steel plates to the cube frame of my sawmill with ¾” spacers between. I drilled and tapped the frame to receive these bolts. Then drilled holes in the stainless steel guides every 2” to be able to prevent the saw bar from going too deep. I used the longest stock bar available of 42”. This enabled me to drill the bar and mount two UVH plastic guides 36” apart to match the cube frame. I machined the plastic guides in the shape of the letter “H” so they would slide over the stainless steel smoothly on either side and be captured there. This plastic can be drilled and machined with normal woodworking equipment. Whenever possible use 13mm or 19 mm nuts and bolts so your “scrench” will fit them.

When cutting multiple posts the same length, I use clamps on the mill track to position the carriage in the same spot for different posts. I welded up some brackets to make the clamps work better.

What does it do????

1. The saw cuts exactly perpendicular to the center axis of the log or timber. I mark the centerline of the mill bed for easier alignment.

2. This makes both ends cut parallel.

3. Cut to tape measure length.

4. Cut ridgepole flat. Then roll the log 180º to cut post pockets on bottom side. Make vertical cuts down to selected depth to clean out a spot to bring the sawmill band blade to the proper depth to cut the 12 – 16 – ? length to receive the top of the post. The holes drilled every 2” on the stainless steel guides can be used to prevent the saw from going too deep.

5. I use “V”-block jigs clamped to the sawmill bed to set the logs in and they mostly lay parallel to the mill centerline. These jigs also can raise or lower one end for elevation adjustment.

When not in use, I cock the chainsaw bar in the guides about 5º and it wedges there and does not fall. This keeps it out of the way for normal sawmill operation.

If you have a band sawmill this little modification may pay off for you “Big Time.”

If you have any questions on my “Bandsaw Chainsaw Chopsaw,” please give me a call or e-mail me.

********************

Join GLLCA for more support and tips from a network of experienced log builders!

Posted in Log Building Tips, Ronn Hann, Tools and Jigs | Tagged | Leave a comment

Recreation Buildings and Structures

By Robert G. Kenel (reprinted from spring 2010 newsletter)

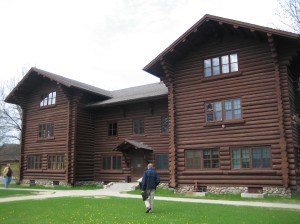
Chippewa National Forest HQ

Chippewa Nat'l Forest HQ, a CCC-built structure in Cass Lake, MN

Recently, I have been involved with reconstructing some government buildings and bridges. My research has intrigued me. The CCC (Civilian Construction Corporation) built many of the projects. My research sent me to the Chief Historical Architect of National Park Service, Randall J. Biallas ALA. I like a lot of the projects designed by Albert Good. He set the standard in 1930 for all national park buildings and projects with logs, natural stone and settings. Herbert Maien was a consultant to the park service since 1920. His input at Yosemite, Grand Canyon and Yellow Stone, helped establish the rustic style, which the log builders still build today.

My research is on going and I like the history. I keep going back to the book “Wood Handbook”. Published by Algrove Publishing Limited, put together by USDA Forest Products Laboratory. All log builders should have a copy of this book. Read and understand what is written. This is as important as your chain saw. If you don‟t have a copy, get one, its time you get educated.
There is a big market in government work with the Parks and Recreation Department. The national government has projects and so does each state. I would like to have GLLCA members get some of this work. The problem is, they don‟t know we are here and the standards they use are 1930. We could help the government to update and bring more log work to the GLLCA. Another one of my ideas, I can hear the board now, oh boy.
Just look at the signs the state parks and national parks use. There are guesthouses, camp grounds, shelters, bridges, walk ways, etc. Not to mention all the existing structures that need restoration. Community buildings, Indian projects, historical buildings, yes even out houses. Old forts need to be kept up and restored.

The problem is the government still uses old out of date 1920-1930 guidelines and standards we can change this. If you have an extra $100, you can buy a book I read and am going back to it over and over again. Great information, photos, and drawings. A must have. The name is “Park and Recreational Structures” by Prinaton

Architectural Press originally published in 1938 by the Department of Interior as a 3 volume set. The history and photos I have been looking at are similar in the book and gave me ideas of how to build and recreate. My research brings up coatings, pesticides, building green, vocs, grading, and engineering. It has been tough, like I am back in college again. Consulting and advising in restoration has been good to me and I can see it may help all the log builders who would like to increase their knowledge and possibly their workload.

Lots more work needs to be done with the contacts and related information. The GLLCA may be instrumental in rewriting the 1930’s standards. Maybe we could get a committee together if anyone else is committed and I mean committed. Until then, adios.

******************

Join GLLCA for more support and tips from a network of experienced log builders!

Posted in Log Buildings, Robert Kenel | Tagged | Leave a comment

Underscribing or Overscribing?

By Robert L. Gifford (reprinted from spring 2009 newsletter)
This is a subject that gets bandied around every year or so in the newsletters of one log building organization or another. It still confuses a lot of log builders, but is so basic that it can confuse a
person. The main purpose of underscribing or overscribing is to keep the corners tight, something that cannot be adequately accomplished in a machined “D” log house, or any other machined log.

There are those that would use several under/over scribed measurements on each round because of different log lengths in that round. Then there those who use different amounts of under/over scribe measurements based on the height of a particular round of logs

Back in the nineties while attending Pat Wolf’s School of Log Building, who has since retired, I was taught to use only one measurement of underscribing throughout the entire house. That is to underscribe at the corner notches only, and when you give it some thought it makes a lot of sense.

We figure that on Eastern White Pine we get about 6% shrinkage, or 3/4ths inch per foot of log wall. Now since this is a constant for this particular log wall, to keep the corners tight it would only make sense to use one under scribe measurement throughout the entire log home. Then each corner would shrink about the same and keep the corners tight no matter where in the log wall they were.

In keeping the corners tight throughout the log shrinking period of five years, you only need to underscribe the corners between 1/4th inch – 3/8ths inch. Why this amount? Because that is the amount that a Eastern White Pine Log will shrink on one side of the log if it shrinks a total of 3/4ths inch per foot of involved wall.

Another important purpose of underscribing a log is to get 1/3rd of the weight on each corner, and 1/3rd of the weight on the middle of the log’s length. This allows the log to settle evenly
throughout the shrinking period, and to let the log do some twisting if it needs to without breaking its seal between logs.

If the underscribing is too much, the log material under the notch on the saddle will crush instead of compress, and the middle of the log will never settle properly. This crushing is telling you that the corners are supporting too much weight, and the middle of the log has a lot less than 1/3rd of the weight. Just keep in mind that as the notches shrink, so does the rest of the log, keeping the 1/3rd weight on the corner notches and 1/3rd the weight on the middle of the log. This gives a stable log wall that never opens up at the corner notches. If properly scribed and cut, it never lets light or water infiltration occur.

Of course there is one more question, at least one. What if I use large or small logs? Well that is quite simple also. If you’re White Pine logs are 15” or under at the butts, use 1/4th inch of underscribe at the notches. If you’re White Pine logs are 16” or larger use 3/8ths inch of underscribe at the corner notches. It’s all really quite simple:

1. Use ½ of the normal shrinkage per foot of wall to determine the amount of underscribe at the notches. White Pine 1/4th inch – 3/8th inch of underscribe.

2. Use the same measurement of underscribing throughout the entire log home. Do not deviate.

3. Let 1/3rd of the weight of the log rest on
the notches, and 1/3rd of the weight on the middle of the log. (this is accomplished by #1 above)

4. The logs at the top of the wall shrink the
same as the logs at the bottom of the wall, so use the same underscribe measurement at the corners for every round of logs.

5. Remember, rubber seals do not make up for lack of craftsmanship.

6. To set your scribe, get the widest gap between the logs, add at least ½ inch if the logs are 16” and over, and 1/4th inch if the logs are 15” or under, Scribe from one notch to the other, then subtract 1/4th inch – 3/8th inch and scribe the notches at both ends of the log. Well there you have it. Not very complicated
and it works every time. Until next time…. Be Safe.

*******************

Join GLLCA for more support and tips from a network of experienced log builders!

Posted in Log Building Tips, Robert Gifford, Techniques | Tagged | Leave a comment

Roof Trusses

By Frank Vanderveur (reprinted from fall 2009 newsletter)

Frank Vanderveur

First of all, thank you for choosing me as a GLLCA board member. I hope to contribute my experience in the log building world as well as promoting the profession.

Looking back at building my own log home, I have some information to share. Before we started building, I considered a few different options on what roof system I should put on the log home. I chose the roof truss system to be made out of prefabricated dimensional lumber [2×6] and a log ridge pole with post, rather than log purlins and log trusses. I cut the plate log flat after using the laser to lay out our elevation. The ridge pole [64′] was on the ground for layout. I pre-cut the flats to receive the upright post and did the final flat cut on top of the ridge pole to receive the 2×6 on which the roof truss is to sit on later.

The 2×6 act as a spacer for future T&G in the ceiling. After cutting the tenons on the post and the mortises in the ridge pole, the final move was lifting the post and ridge pole up. After placing the ridge pole, we were ready for the roof trusses. These were pre-made for the whole house. Each truss had its own number referring to the drawing plan and the house. It went up fast and precise. In one part of the roof system they designed and built a re-enforced truss system [with several trusses], making it extra strong for a future log ridge accent piece. The depths of the trusses are 24”. This will give me a fascia of about 24”, which is too wide for me. To accommodate this I used a 9 ¼” I-joist starting at the gable end and working out.

Looking back at this procedure, I like the way everything was put together like a puzzle. It made it easy for the carpenters to install the roof trusses. The designing part took time to figure out, but with the assistance of the designer of the company, it was time well spent. There is plenty of room [2′] in the trusses for wiring [no drilling], light canisters, and two layers of insulation bats. Above the insulation there is plenty of room for air movement to the ridge vent.

********************

Join GLLCA for more support and tips from a network of experienced log builders!

Posted in Frank Vanderveur, Log Building Tips, Techniques | Tagged | Leave a comment

Work Safe

By Bob Kenel (reprinted from fall 2009 newsletter)

In my travels, I keep seeing dangerous practices at some of the sites and yards I have visited or worked at with employers. It is your responsibility to know and implement mandated safety rules. One may refer to OSHA Construction Safety Standards. In my State of Michigan, Call MIOSHA @1-800-866-4674 or visit http://www.michigan.gov/mioshastandards.

Remember to do a tool box talk every month with your employees, document, and have them sign attendance. Keep this in your records for any future OSHA or Safety Audit. All employees must know where the MSDS, first aid, fire extinguishers, eyewash and an emergency plan with phone numbers are to be found at each yard and jobsite.

I have talked before about cables, rigging, and straps. I would like to give you some information about scaffolds.

PUMP JACK SCAFFOLD – Use appropriate fall protection systems when required in pump jack scaffolding. Only two workers are allowed between any two adjacent supports, and this type of equipment cannot be used at heights greater than 30 feet.

LADDER JACKS – Ladder jacks may not be used for heights greater than 20 feet. Appropriate fall protection must be used at 10 feet or greater. Ladders must be set at a 4 to 1 ratio with jacks adjusted to ensure pick is level.

TUBULAR FRAME SCAFFOLD – Inspect all welds for cracks. Use cross bracing for stabilization, leveling screw jackets, baseplates and mudsills must be utilized. Guardrails (top, mid and toe boards) must be used when required. Refer to the manufacturer‟s specifications for supporting the scaffold or use the 4 to 1 height ratio. Cross bracing may not be used as a means of access or egress.

****************

Join GLLCA for more support and tips from a network of experienced log builders!

Posted in Log Building Tips, Robert Kenel, Safety | Tagged | Leave a comment

A Simple Method For Aligning Logs

By Curtis Lindberg (reprinted from fall 2009 newsletter)

Like many of you know aligning a plate log to cut on a mill can be very frustrating and time consuming. First you have to rotate the log so the roofline is level, that part is pretty easy. Now you have to get both ends at the same elevation. So you shim under one end to raise it, when you do this the other end goes down. To get both ends at the same elevation, it takes many trips to each end of the log to check the elevation. On a forty-foot log this gets to be a lot of walking. While shimming the log, there is always the chance it is going to roll and you are going to have to readjust that too. I find this very frustrating but there is an easier way.

When you have a plate log up on a wall, and after you have drawn the rooflines on it, draw a second line at a 1-inch offset below the roofline. Now screw square pieces of ¾ inch plywood, of the same size, to the end of the plate logs so one edge of the plywood is lined up with the offset line you just drew. You want to make sure that the plywood extends beyond the log. I call the square pieces of plywood “blocks”. Now when you set the log on the mill, the blocks will rest on the bed of the mill and your log will automatically be aligned and ready to cut. You might have to put some planks across the bed of the mill so the blocks can rest on them.

This method of aligning logs also works well for aligning logs in mitered trusses. First draw the centerlines on the end of logs. Now screw on your blocks to the end of the logs. Line up the blocks with the centerlines you just drew. Our Minde jig works best if the centerline of the logs are 18” off the floor, so we use 18”x18” blocks and line up the top edge of the block with the horizontal centerline. Since most of the cuts you will make for a truss will cut the end of the log off, you will need to put legs on the side of the logs. Make sure the legs will not get in the way for the cuts you need to make. Just use scrap lumber for the legs and screw them to the side of the logs. You will want to make sure they are strong enough to stand up to some abuse. Once you have the legs on the logs, you can now take the blocks off. The logs are now ready to cut. Leave the legs on the logs until you get the truss assembled.

I find blocks on the end of logs to be a quick and accurate way to align logs. It also works very well with crooked logs or crotched logs where you are not able to snap chalk lines on the log.

******************
Join GLLCA for more support and tips from a network of experienced log builders!

Posted in Curtis Lindberg, Log Building Tips, Techniques | Tagged | Leave a comment

Letter from the President

By Bob Kenel (reprinted from fall 2009 newsletter)

Bob Kenel

Another fine and successful conference is behind us. It was great to have a joint meeting with ILBA hosting people from around the world that share the same interest. It’s always a lot of fun to see everyone and share friendships.

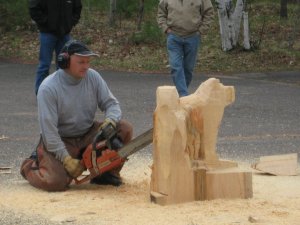
If you were not able to make it to this conference, you missed out on the funniest, most hilarious thing ever seen by mankind. It happened at the grand dinner that evening. But started hours before when the 8 Time World Champion Chainsaw Carver, Mannu KyllÖnen, did an exhibition of his work prior to tool tech. He chainsawed a Norwegian dog similar to a husky in about 30 minutes. It was expertly done and a fine piece of artwork. All that attended were amazed at the speed, craftsmanship and detail accomplished.

Mannu KyllÖnen

8 Time World Champion Chainsaw Carver, Mannu KyllÖnen

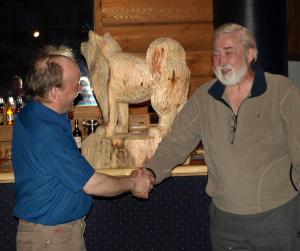
It was later announced this carving was up for auction at our dinner. As things go, all showed interest as the bidding continued very generously, I might add, as it came to a close. The generous bidder was none other than Gary Pavlicek. I suggested that Gary and Mannu have their picture taken for the newsletter. Gary is shy but with the help of his wife, Karen, Gary came up. A few photos were taken and then jest and fellowship with a non-English speaking chainsaw carver happened. They hugged, shook hands, laughed and joked as the camera clicked. The carver then kissed the mouth of the carved husky and, yes, Gary did too. In front of all present, he kissed the other end of the dog. The whole group laughed hysterically. The waiters, bartender, Karen, his wife, Gary’s family, Gary’s friends, and all of us. That one moment was worth the trip. Gary was a very good sport. I think those photos were sent to USA Today and perhaps somewhere on the internet.

Chainsaw Carving of Dog

The above photo was provided by Kevin Maynard. Gary is thanking Mannu KyllÖnen for the beautiful work he did on the carving

I also enjoyed some rare vodka from a crystal skull purchased by Chris Clay at the auction. Chris was harassed by many to open it and share, which he finally considered to do if he was to leave unharmed.

Now, it is a fact that the GLLCA conference gets better and better every year. Successful people belong to successful organizations.
Join or renew and learn.
Grizzly Bob

********************

Join GLLCA for more support and tips from a network of experienced log builders!
Posted in Conferences, Robert Kenel | Tagged | Leave a comment

Log Home Builder; Citizen-Soldier

By Chris Clay (reprinted from spring 2009 newsletter)

Ron and Nathan Heim are log home builders and GLLCA members. Ron has been a long time member and his son, Nathan, is a new member. There are, within our association, several examples of one generation passing the family business on to another generation, and for the Heims some parts are like others yet some are notable.

Nathan Heim

Nathan started helping out at the log yard in high school and through college. He progressed through those recognizable entry level activities of general cleanup and log peeling, then onto scribing and putting everything together. That, by itself, would be a good foundation for moving into the business side of the company with an eye on assuming a leadership position. Nathan went beyond that for additional preparation and completed a Construction Management Degree at Bemidji State University. In a constantly changing business environment every bit of knowledge helps.

The role of citizen-soldier entered the picture when Nathan joined the Army National Guard just after high school, and it looks like a long term commitment. He served one tour in Iraq with an engineering company from Camp Ripley, Minnesota, and is currently training as a Warrant Officer candidate. That deserves a round of applause and our thanks. Serving one’s country is both an honor and a responsibility often shouldered in difficult circumstances.

Returning from Iraq, Nathan attended Ron Brodigan’s log building school then afterwards he and Ron built a spec log home. In January, 2005 they decided to work together in a full time business. When talking with them, they emphasized the same main points for successful transition. First are open communications and the importance of putting everything in writing so everyone knows the plan and misunderstandings are avoided. Ron looks at the transitioning as something where the next generation gets involved early on and takes on responsibilities to gain experience. Nathan feels his construction management background has been useful for working with clients and subcontractors. He sees the company moving towards general contracting of log home projects. He also finds there’s a balance of time commitments between the military, the business, and his personal life. Most of us recognize that as the kind of busy schedule productive people take on.

Nathan is overall optimistic about the future and wants to have the flexibility to take on different kinds of projects. To him that means investment in tools and the things which make different kinds of projects possible. It might include buying land for future development. “Every day is a new experience and new opportunity.” When Nathan attends GLLCA meetings, he likes seeing log builders of his generation and, at the same time, seeing the enthusiasm of older members. The challenge for one generation is passing on knowledge to the next, and this is a good group for that sort of thing. We look forward to seeing him at future meetings joined by other new members.
********************
Join GLLCA for more support and tips from a network of experienced log builders!

Posted in Chris Clay, Log Builders | Tagged | Leave a comment

Save Us

By Bob Kenel (reprinted from spring 2008 newsletter)

Over the last 30 years of log building and restoration, I thought by now I’ve seen just about everything. In stick built construction I may have, most are built fairly the same. Older log construction on the other hand was mostly built by craftsmen in their time. I have restored many “log cabins” as they are called now, back in the 1890-1910 they were homes.

By 1920-1940, cabins became popular for recreation in forests throughout the United States and Canada. There were hard economic times then too. Trees were on site and free. These cabins were built for summer use not winter. There were no cranes, chainsaws or bandmills back then. Log were cut, handled and peeled by hand.

Most cabins had low roof pitches and stone masonry fireplaces. There was no original plumbing or bathrooms. The outhouses were made along with hand pumps and shallow well of crocks. As cabin dwellers evolved; the demand for electric, indoor plumbing and alternate methods of heat became a must.

Most cabin owners tried to do these things on their own. Lacking in knowledge, they made up in ambition and so wires were stapled to logs, plumbing poured into slab floors which was sometimes not deep enough for frost protection. Sewers were run to self made tanks with no bottoms or fields. The electric had no grounds and runs were added anywhere with a cut and some cloth electrical tape. Most of the cabins were built on a slab with about 12” deep rat wall footings and ground level or just above. This created the service of log restoration. We all know logs must be as high off the ground as deemed necessary to keep them from deteriorating. The logs were repaired mostly by owners using concrete to fill in the rotten area and painted or stained over to disguise the cement. Log tails have been cut off or shortened.

The roofing most often has been reroofed with no consideration for insulation or snow loads. I find it astonishing that rafters 20’ long with 5” butts and 3” or less tips resting on a 1” x 6” ridge placed 3’ or 4’ apart have lasted for all those years with Michigan snow loads of 70 to 90 pounds, and do not have caved in roofs. Think about it; mid span rafter logs 4” with 20’ of run 3’ to 4’ centers and 6” sheathing boards and asphalt shingles. In all my experience, I have never seen a caved in roof where full round log rafters have broken.

I am not saying I have not seen roofs with sags, bends, bows or an occasional cracked member, but no cave ins. I have seen stick built engineered trusses break and rafters fail. Steel has failed in roofs and failed much faster in a fire than a log would according to tests. But why would such small log rafters hold up for all those years? I think this says a lot about how strong logs are. Of course, with engineering design values and proven methods used today, log 400 standards help make it so much easier to build.

I have never reviewed an old log structure that could not be restored to original condition with structural changes to assure the integrity and longevity of today’s standards. I have restored historical, governmental, commercial and residential structures to the perfection of architects, officials and homeowners. It is very rewarding to achieve success in today’s market in log restoration. I have to give credit to my predecessors because for every cabin and building I restore, I have gotten more and more education. All the building techniques, fasteners, coatings, and geographic areas have furthered by education. In log building and stone masonry, we must try to preserve the handcrafted buildings to further the craft of restoration today. We must assure the restoration trades to encourage the owners to restore.

Many folks are sacrificing handcrafted quality for stick built “log” (?) sided homes. These woods don’t seem to go together. A log is a log period.
************************
Join GLLCA for more support and tips from a network of experienced log builders!
Posted in Log Buildings, Robert Kenel | Tagged | Leave a comment